The brake booster is the heart of the power brake system. When you step on the brake pedal, the booster multiplies the force from your foot, thereby reducing the effort needed to stop the vehicle.
These days, we take power-assisted brakes for granted. This technology wasn’t always commonplace—until power brakes became the norm in the late 1960s, many drivers relied solely on their leg muscles to provide braking assist.
With that said, when the brake booster fails, you’re likely to notice it right away, as this issue usually produces one or more noticeable symptoms. Obviously, because the booster affects your car’s braking ability, you’ll want to address any problems right away.

What are the Signs of a Bad Brake Booster?
If your car has a bad brake booster, you’ll likely notice one or more of the following signs:
Hard Brake Pedal
A hard brake pedal is the most common sign of a bad brake booster. When the booster fails, you no longer have braking assist, which means you’ll need to exert more effort to apply the brakes.
Increased Stopping Distance
Without the booster providing braking assist, you’ll have to work harder to apply the brakes. This typically results in an increased stopping distance.
Hissing Noise
A vacuum-operated booster that’s leaking through the housing or diaphragm can create a hissing noise. You may only hear the noise when applying the brakes.
Fluid Leaks
Hydro-boost brake boosters use power steering fluid to provide braking assist. As such, a leaking hydro-boost unit can develop visible fluid leaks. Electronic brake booster assemblies that are housed with the master cylinder can also develop leaks.
Stumbling or Stalling Engine
How to tell if your brake power booster is bad can also be as simple as checking or listening to your engine. If you notice it stumbling or stalling while driving, it can point to a massive vacuum leak in the booster.
The leak can make the system draw more boost than normal while braking, which can take too much vacuum away from other vital components. That can cause stalling or stumbling in the engine and even lead to RPM drop.
Illuminated Warning Lights
An issue with the electronic brake booster assembly can affect anti-lock braking system (ABS) operation. As a result, a failure of the assembly has the potential to trigger warnings, such as the ABS, traction control, and stability control lights.
It’s also possible for a leaking, vacuum-operated brake booster to cause the engine to run lean, which can trigger the check engine light.
What is a Brake Booster?
As was mentioned, the brake booster reduces the effort the driver needs to apply the brakes. The booster does this by applying force to the master cylinder—a device that distributes pressurized fluid to activate the brakes.
There are three primary types of brake boosters:
- Vacuum-operated
- Hydro-boost
- Electronic assemblies
Vacuum-Operated Brake Booster
Most brake boosters are vacuum-operated. With this design, an internal diaphragm separates the two sides of the booster. The two sides are sometimes called the vacuum chamber and the working chamber.
When the brakes are released, there is an equal amount of vacuum in both chambers. Applying the brake pedal operates a control valve, which allows atmospheric pressure to enter the working chamber. As a result, a pressure difference is created that causes the booster’s pushrod to apply force to the master cylinder, creating brake assist.
Hydro-Boost Brake Booster
Some vehicles use a hydro-boost brake booster. With this type of booster, the power steering pump creates hydraulic pressure to provide braking assist. Pressure from the pump acts on a power piston inside the hydro-boost assembly. The piston then pushes an output rod that applies force to the master cylinder.
Electronic Brake Booster Assembly
Electronic brake booster assemblies are becoming increasingly common. You’ll often find this design in hybrid and electric vehicles that have zero (or limited) engine vacuum and electric power steering.
There are a variety of electronic brake booster designs in use today. Each uses a collection of sensors (i.e., pedal stroke sensor, speed sensors, etc.) to determine vehicle operating conditions. An electronic control unit (ECU) uses that information to activate the electronic brake booster.
The booster and master cylinder then create the hydraulic pressure needed to provide braking assist.
Often, the electronic brake booster is integrated into an assembly with the master cylinder and ECU. Other components may be part of the assembly as well.
How to Test a Brake Booster (Vacuum-Operated)
The steps for testing a brake booster will vary depending on the vehicle and the booster’s design. The information below is generic and for entertainment and educational purposes only.
Be sure to follow the factory repair information for your specific application.
With that in mind, let’s discuss general brake booster test methods for a traditional, vacuum-operated unit.
Check Booster Operation and Vacuum Reserve
Vacuum-operated brake boosters have a reserve to provide braking assist if engine vacuum is lost. You can check that the booster is operating properly and has an adequate vacuum reserve (indicating it’s free of leaks).
Here’s how it’s done:
Test Booster Operation
- Apply the brakes several times with the engine OFF to deplete the vacuum reserve.
- Keep the brake pedal applied and turn the engine ON.
- Once the engine starts, the brake pedal should drop if the booster is working properly.
- If the pedal does not drop, check that there is an adequate vacuum supply to the booster. An adequate vacuum supply indicates the booster is likely faulty and should be replaced.
Tip: Because the booster relies on engine vacuum, an inadequate vacuum supply can mimic a bad booster.
Check Booster Vacuum Reserve
- Start the engine and accelerate it momentarily.
- Let the engine idle for one minute, then shut it off for a few minutes.
- Apply the brake pedal several times. If the booster is holding vacuum, the first couple of applications should have power assist. Then the pedal should become firm.
- If there’s no power assist, either the booster or its check valve is leaking.
- You can check the valve by blowing through its intake end. If you hear air passing through the valve while blowing through it, the valve is bad and should be replaced.
Otherwise, the booster is likely faulty.
Brake Booster Replacement (Vacuum-Operated)
Tools & Supplies Needed to Replace a Brake Booster:
The tools needed to replace a brake booster will vary, depending on what type of car you have.
In general, however, you’ll need:
- Pliers
- Ratchet set (ratchet, sockets, and extensions)
- Repair manual or access to a repair database
- Safety glasses
- Screwdrivers
- Torque wrench
- Wrench set
Vacuum Brake Booster Replacement Instructions:
Before we begin, keep in mind: all vehicles are different. The information below is generic and for entertainment and educational purposes only. Be sure to follow the factory repair information for your specific application.
Repair manuals, such as those from Chilton, are useful, but a subscription to a repair database is even better. ALLDATA and Mitchell 1 both have single-vehicle subscriptions for DIYers that provide detailed factory repair information.
You can learn more about accessing quality repair information in this article.
Vacuum Brake Booster Removal:
- Put on your safety glasses.
- Use a wrench or ratchet to unbolt the master cylinder from the brake booster.
Note: In most cases, you do not need to disconnect the brake lines from the master cylinder. The brake lines are usually long enough and flex to allow the master cylinder to be moved aside, away from the booster. If you do need to remove the lines, be sure to properly bleed the brake system afterward, or you will have little to no braking ability. - Disconnect the booster pushrod from the brake pedal.
- Disconnect the vacuum hose going to the brake booster.
- Use a wrench or ratchet to remove the fasteners securing the booster to the bulkhead.
- Remove the brake booster from the vehicle.
Vacuum Brake Booster Installation:
- Compare the new brake booster to the old brake booster to ensure that both are the same design.
- Mount the brake booster in the vehicle.
- Consult a repair manual or repair database to determine the proper torque for the booster’s mounting fasteners. Then, use a torque wrench to tighten the fasteners to the manufacturer’s specification.
- Reinstall the vacuum hose going to the brake booster.
- Reconnect the brake booster pushrod to the brake pedal.
- Mount the master cylinder onto the brake booster. Use a torque wrench to tighten the master cylinder retaining fasteners to the manufacturer’s specification.
Note: Check the brake pedal height and free play after replacing the master cylinder. If necessary, consult a repair manual or repair database for the proper adjustment procedure.
Replacing Your Vehicle’s Brake Boosters
It’s not a good idea to drive with faulty brake boosters. Thankfully, it shouldn’t be too difficult to find a replacement here at CarParts.com.
You can get brand-new brake boosters without taking one step outside your door. To get started, visit our website and use our vehicle selector to narrow down our catalog to your model year’s compatible parts.
Quality auto parts don’t have to cost you an arm and a leg. We source our products from some of the top aftermarket brands in the industry. You can rest assured that these components were engineered to OE specifications in world-class facilities for guaranteed fit and performance.
Worried about extended shipping times? Don’t worry! You’ll get your order in a matter of days. We have several distribution centers across the US to ensure fast and efficient shipping.
Don’t let a bad brake booster keep your vehicle stuck in your garage for too long. Order your new brake components today!
Products Mentioned in this Guide
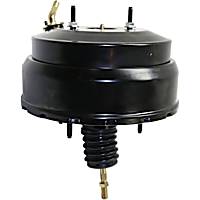 Brake Booster
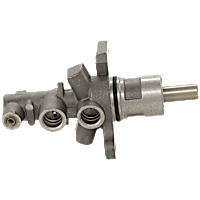 Brake Master Cylinder
Keep Reading: Related Posts


Any information provided on this Website is for informational purposes only and is not intended to replace consultation with a professional mechanic. The accuracy and timeliness of the information may change from the time of publication.